Creative Process
My paintings are created using the traditional Mughal and Persian miniature techniques I learned in art school in Pakistan.
All of my works are painted on handmade wasli paper—a special art paper made by sticking together several sheets of paper using a glue made by heating flour and water together, and then adding copper sulphate. This poisonous chemical acts as an anti-microbial and anti-fungal, thereby protecting the wasli from insects. Although I used to make my own wasli, I now purchase it from Pakistan.
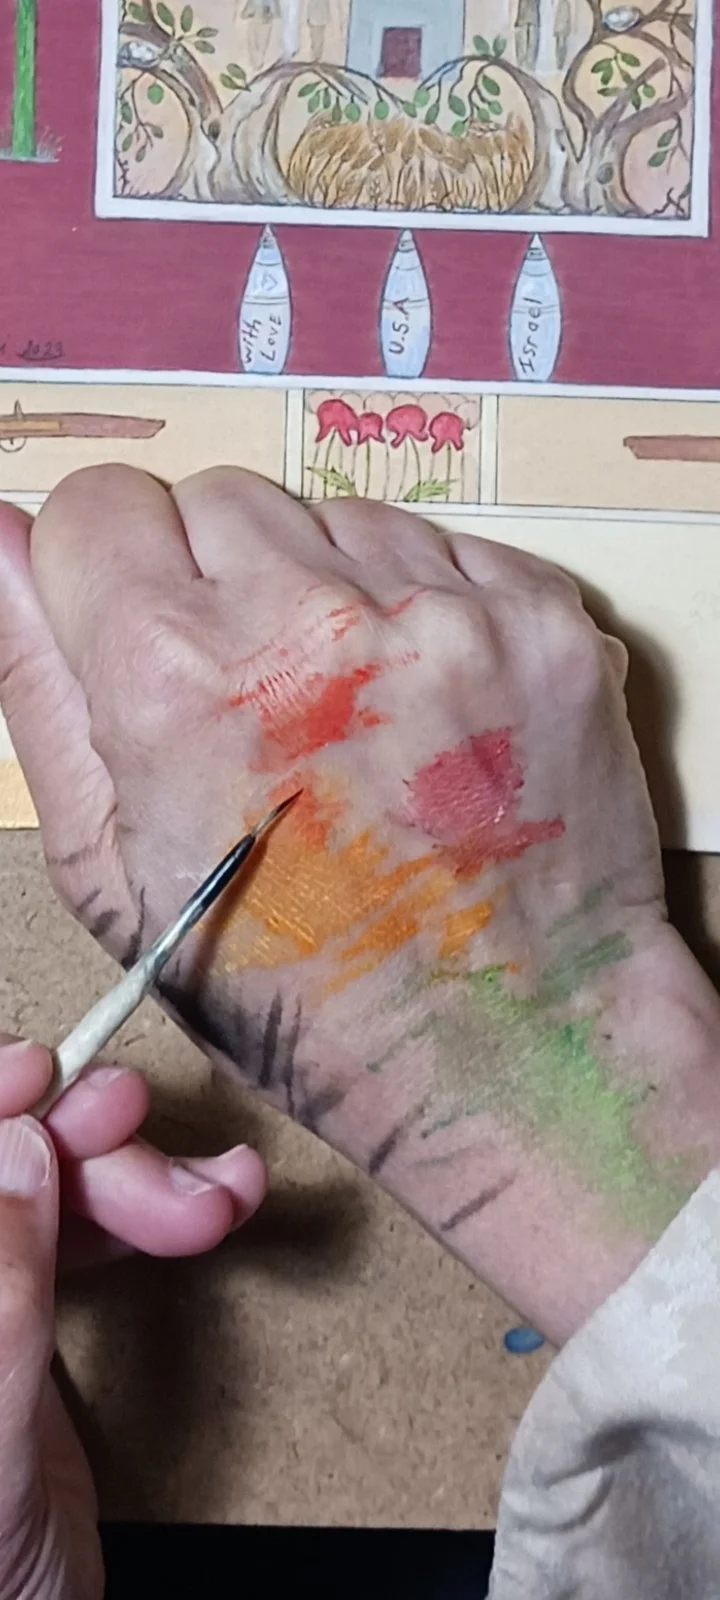
Like all traditional miniature artists, I use my hand as a palette to mix the colours and to control the amount of paint going onto the wasli.

I use the traditional method of keeping the paints in seashells. This shell contains “shell gold,” a handmade gold colour. I use the squirrel-hair brush for pardakht (see below) and painting finer details.
Creating Lest We Forget 1948-2024, An Ode to Palestine

STEP 1
I draw the basic composition in my sketchbook using a pencil, trying to make it as final as possible.


STEP 2
I trace that drawing onto tracing paper, and then retrace it onto the reverse side of that tracing paper.

STEP 3
After boiling tea leaves in water and straining the mixture, I create a tea wash to stain the wasli, giving it a uniform background colour. I then let the wasli dry for a few days.

STEP 4
When the wasli is completely dry, I transfer the basic composition’s image from the reverse side of the tracing paper onto the wasli using the same technique as Persian shamsa artists. (A shamsa is an intricately decorated medallion used in illuminated manuscripts. It means “little sun” in Arabic, and is often stylized as a sunburst.)

STEP 5
I lightly outline the image with red ink.

STEP 6
I then prime the surface where the image appears with an extremely diluted safaida wash. It needs to be light enough so you can still see the underlying image.
To make safaida, I use the method we learned in art school—mixing zinc white (in its liquid poster color form) and water. (This takes about four weeks.) Afterwards, I add gum arabic to the safaida I’m about to use (keeping the rest for later). The amount of gum arabic is important. Too much, and the watercolour will crack or become too shiny. Too little, and it will create a chalky surface that can rub off when touched.
STEP 9
I then use a dry brush technique to fill in the gaps in the applied colours to make them even throughout, and to smooth out the paint surfaces.
STEP 12
Finally, I burnish the finished painting again to give it a beautiful sheen.


STEP 7
Once the safaida wash is completely dry (usually after a day or so), I burnish the wasli with a smooth seashell to thoroughly seal the fibers so there are no bumps or rough spots. I then lightly outline the drawing again, this time with black ink.
STEP 10
In order to create volume and texture, I then use tapai—contour shading that accentuates the contrast between light and dark.

STEP 8
I apply thin watercolour washes to all the places that need colouring.
STEP 11
After burnishing the painting again, the next step is called pardakht. Using a fine squirrel-hair brush, I render details such as faces, animals, leaves, and clothing.